Rear Recovery Points.
Defenders in general, and the 90 in particular, have superb approach and departure angles. The departure angle of a Defender 90 on standard 235-85-16 tyres is around 52 degree's. Standard towing kits however can reduce this dramatically as they have to be low enough for a trailer or caravan to fit and tow safely. On previous (Tdi) Defenders I've removed the standard towing arrangment (I don't do any towing) and replaced it with JATE rings for recovery. Due to the relocation of the fuel tank from underneath the drivers seat to between the chassis rails at the rear on the Td5 (and Tdci) fitting these can be a problem. To begin with, removing the bolt that passes through the chassis holding the lashing eyes in place is impossible unless you (a), grind it off, or (b), drop the tank slightly to allow enough clearance for the bolt to be withdrawn. Once the bolt is removed, unless you have elected to drop the fuel tank slightly (and risk breaking some of the plastic fuel lines), fitting the JATE ring can also be a problem. There is little enough clearance between the fuel tank and the chassis rails to fit a nut (hence why Land Rover fit the bolts to pass from inside to outside the chassis rails and then fit the fuel tank afterwards during assembly). With standard JATE rings out of the equation (unless you want to drop the tank), what are the alternatives?
Alternative Recovery Points.
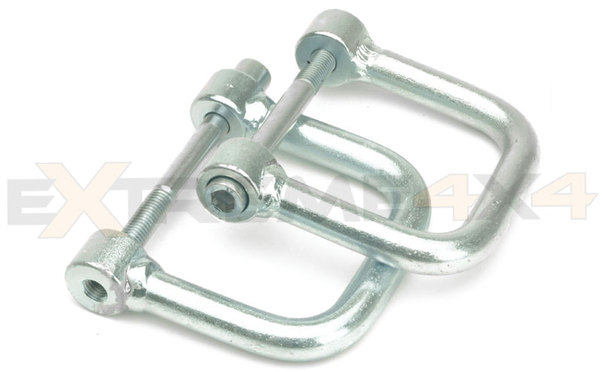
One possible solution I looked at is to use threaded JATE rings. The JATE itself is threaded one end (see pic below), doing away with the need for a nut. The only place I have seen these are at Extreme 4X4. I decided against using these however as they are welded. Now I'm not saying these aren't up to the job, I've never seen these in the metal and I'm sure they're plenty strong, but the forces involved in recovering a very stuck vehicle can be enormous and I don't fancy trusting weld. I'm sure there's plenty people to disagree with me but you pay your money and make your choice.
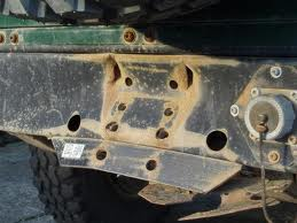
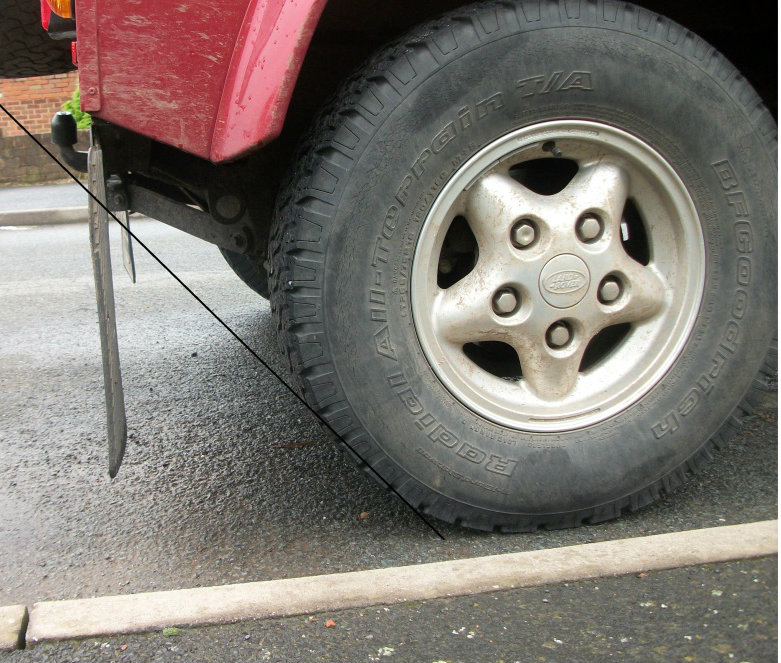
The other alternative I considered was simply bolting a jaw & pintle style attachment direct to the rear cross member as so many Defender and Series owners do. In the end I decided against this method also as it easy to damage the rear cross member (see pic on left), even with a backing/spreader plate, during an heavy recovery
Final Solution.
The Standard set up is beefy enough to handle heavy recoveries but limits the departure angle to much. The alternatives leave the departure angle intact but are arguably weaker than the standard towing set up. It's easier to modify the standard set up to reduce the loss of the departure angle than it is to strenghten the alternatives, so thats the route I took.
Please note, this modification is for recovery off tarmac only. I don't do any towing of trailers, caravans, etc so ensuring a trailer will still fit and tow safely was not a consideration for me. If you tow you may wish to check that any trailer etc will still tow safely or look at other options before modifying your existing towing arrangement.
Please note, this modification is for recovery off tarmac only. I don't do any towing of trailers, caravans, etc so ensuring a trailer will still fit and tow safely was not a consideration for me. If you tow you may wish to check that any trailer etc will still tow safely or look at other options before modifying your existing towing arrangement.
Removing The Electrics.
Removing the standard factory fit Land Rover electrics on a Td5 couldn't be easier. At the back of the off side rear wheel arch, behind the plastic mud guards that protect the lights from mud, water etc, there is a grey plastic plug that the electrics plug in to (they're just plug and play). Removing the plastic guards will allow you to see what your doing but it's not a necessity, you can slide your hand up the back of the shield to feel for the plug and then pull it down to disconnect. Once disconnected, check that all your electrics (lights, indicators, brake lights, etc etc) still work. I tried to feel for a blanking plug behind the plastic shield to plug the free end of the vehicle plug in to but couldn't locate one. To keep any mud or water out of the plug I wrapped it in electrical tape, placed a plastic bag over it then wrapped that in waterproof tape too, then tucked it back up behind the plastic shield.
Removing The Tow Bar
The standard Land Rover fitment to the Defender consists of a drop plate bolted to the rear cross member and two bars running either side of it to the steel fuel tank guard. Rust, road crud and how much torque was applied when fitted can make these difficult to remove so an extension bar is recommended to remove this. With the towing attachment removed, you need to decide how far up the cross member you want to move it.
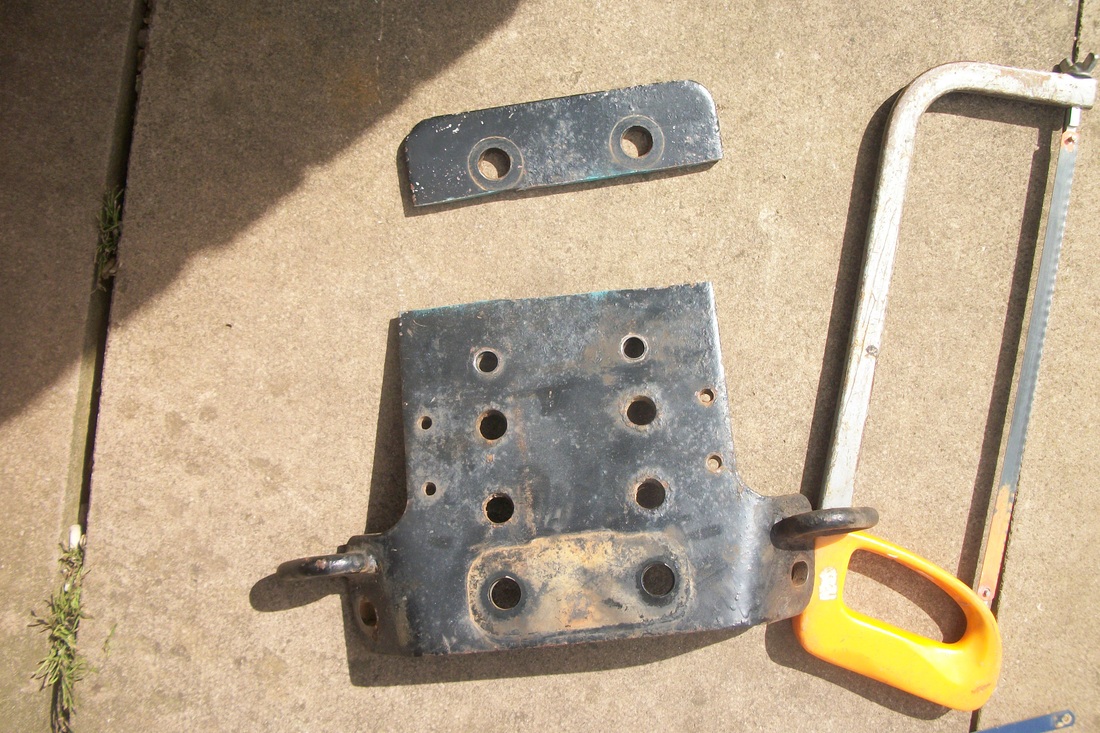
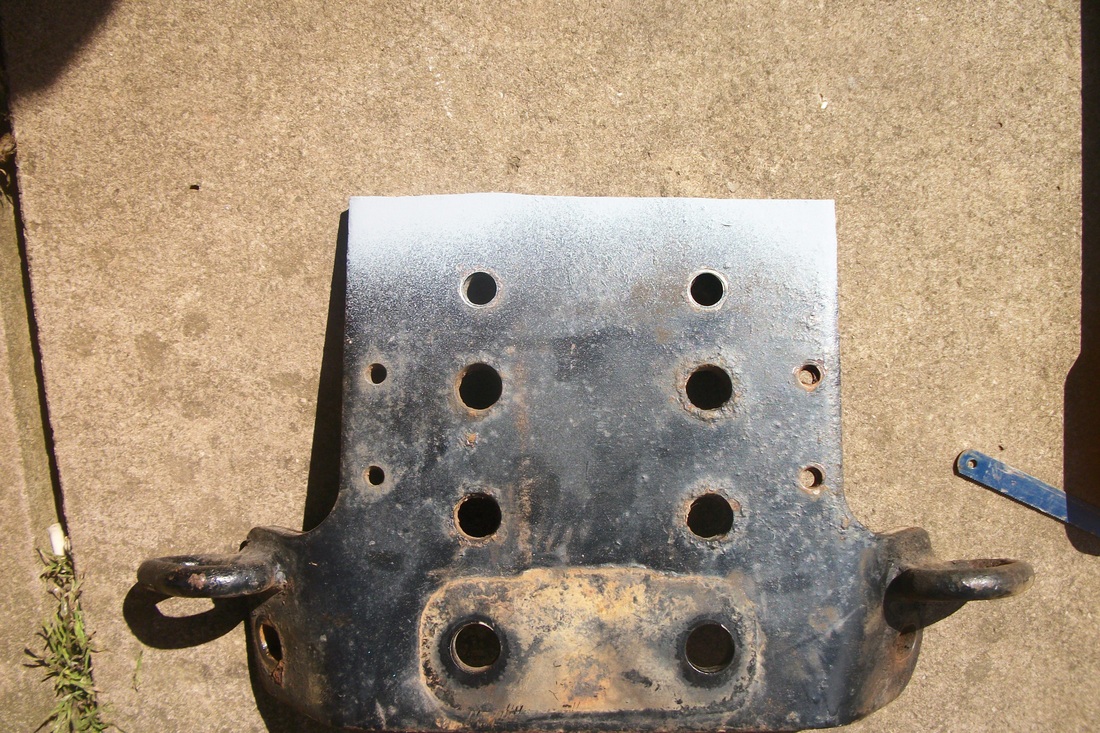
Modifying The Drop Plate
Before bolting the drop plate higher on the cross member you may need to check you will still be able to open the rear door. Offer up the drop plate roughly where you want it to be, make sure the bolt holes line up and then check the door will open. Mark the cut line if the drop plate needs cutting and cut. This is thick steel and takes some cutting (especially if just using and hacksaw like I did). After cutting, remove any burrs or rough edges, prime and spray.
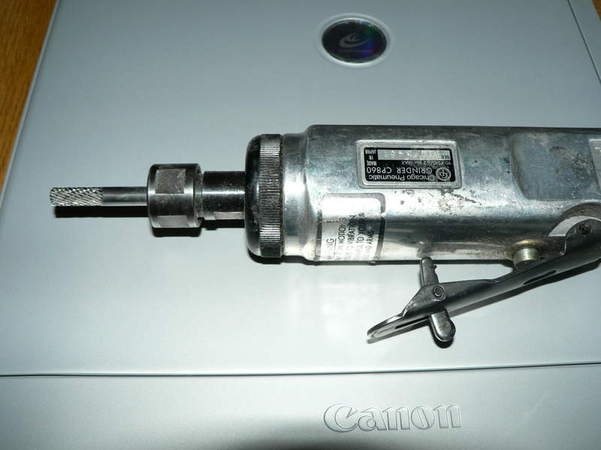
Outer Attachment Bars
Once the drop plate is in position, the outer attachment bars can be re-fitted. The bolt holes through the attachment bars where they bolt on to the fuel tank guard are elongated to allow a certain amount of adjustment, however, depending on how high you move the drop plate they may need to be elongated a touch more. For this I used a deburring tool like the one pictured below.
It's worth mentioning at this point that because of the steeper angle of the attachment bars, if a standard fitment rear step is fitted then this will need to be removed as it will foul the bar on the near side. The step is held in place by two bolts on the underside of the rear cross member. It's possible to get a spanner on the back of the outer one to stop the bolt turning (mine didn't need it) but not on the inner one (which did). As I couldn't get a spanner in there I had to resort to cutting and chiseling the bolt. With the step removed both bars can be offered up and bolted in place.
The End Result.
The end result is a sturdy recovery point anchored to the chassis via the manufacturers fixing points but offers a much better departure angle over the standard fit towing arrangement. I would have preferred it to sit even higher but the side pieces which the side attachment bars bolt to on the drop plate foul the underside of the rear cross member when moved up in to the next set of bolt holes on the cross member. I intend to thin the side pieces on the drop plate slightly at some point in the future to rectify this so it can be moved higher, but that will have to wait until I get my hands on either a cutter or a grinder. For now I've had my fill of cutting through thick steel plate with an hacksaw.
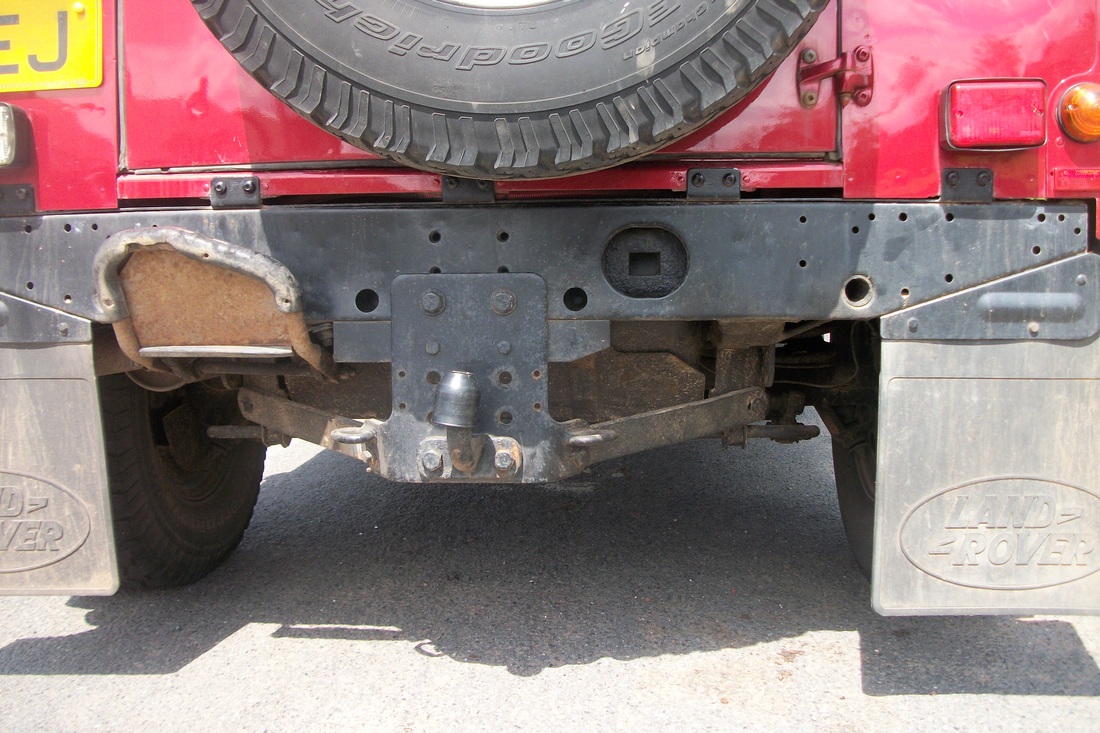
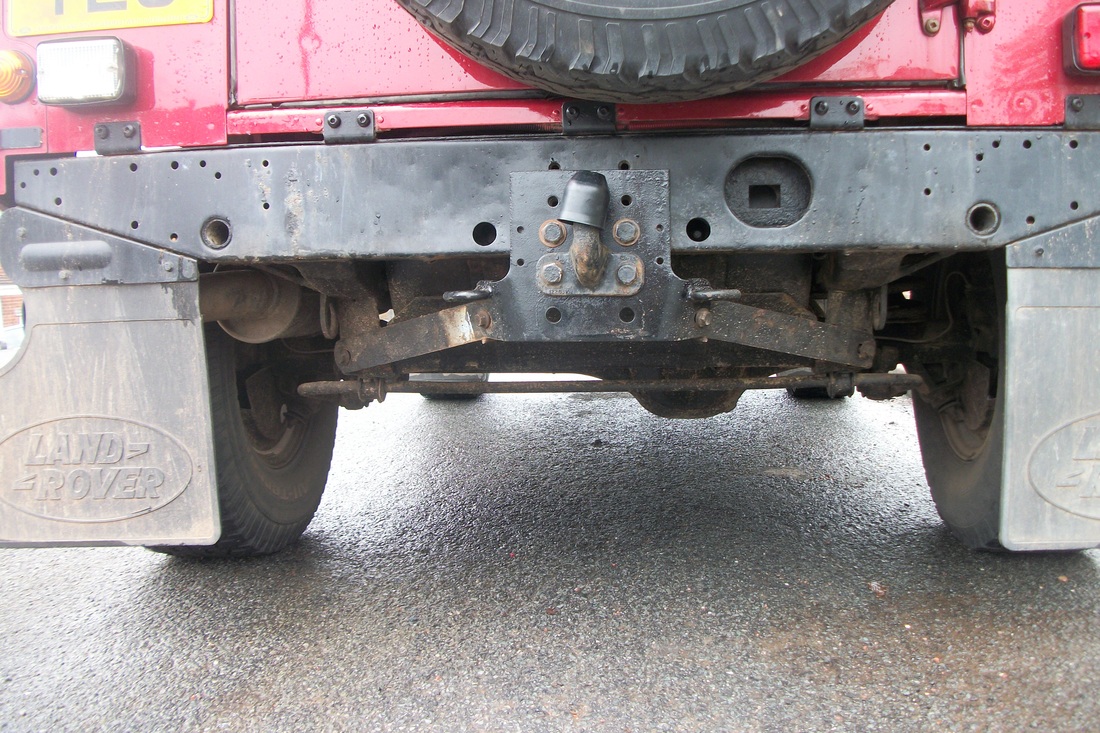
Departure Angle
Before After
Please note, any work, modifications, etc, you carry out on your own vehicle or someone elses is done at your own descretion and the author and/or owner of Defender Td5 site accepts no responsibility for any damage or injury sustained.
Copyright © 2012. No part of this website may be reproduced or republished on another webpage or
website without prior written consent.
Copyright © 2012. No part of this website may be reproduced or republished on another webpage or
website without prior written consent.
